{Creative Palette} Life-size Firecrackers & Pots
May marked what is I think only the 2nd time I didn’t make it to Creative Palette class at 2nd Chance Restoration 😢. Due to a crazy schedule, I just couldn’t make it fit in last month, and boy was I bummed!! Kelly had some great projects, including 3 life size firecrackers that I so wish I was there to make. 
For the firecrackers, you just need some 4″x4″ wood, rope, straw ribbon and paint – Kelly used Mineral and Milk paint, specifically because the MMS Milk Paint dries super fast! 
To start, it’s time to sand! Once you have sanded a 12″, 18″ and 24″ 4″x4″ on all six sides of each piece, it’s time to paint all four sides white. While you the white paint was drying, you can get started on your pot.
In comparison to other projects we’ve done, the pot is super easy. Around the top rim, glue some twine down and wrap the entire top rim with twine. Additionally, the class added a vinyl saying to the pot: “you grow girl”.
Once all the paint is dry on the firecrackers, apply a 1″ wide piece of tape around the wood where you want the blue area to end, about 1/3 of the way down. Then tape from there to the bottom one each corner – you want to cover everything you want to keep white. Also, on the top, apply some vinyl or tape stars to cover the white stars that you want to have showing. Before painting the other colors, drill a hole on the top, just large enough to stick the end of some rope in, to be the wick on the firework. 
Then paint everything above the tape band on the sides blue and paint the lower middle section one each of the four sides red. While you wait for this to dry, you can carefully paint the top white. 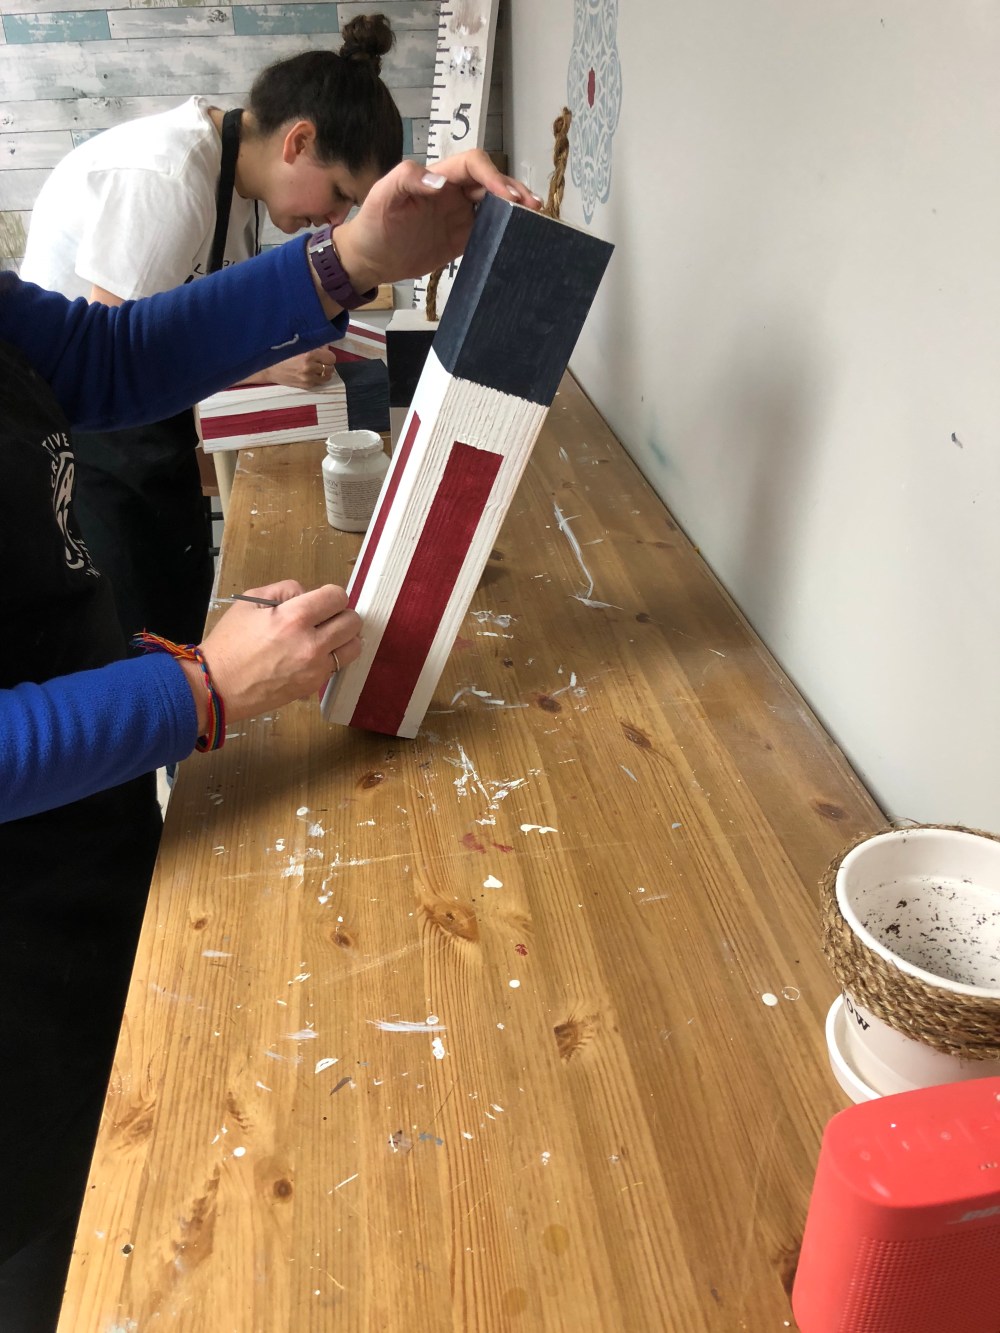
The the final step for the firecrackers is to glue the rope in and take off the tape. Then you can take some straw ribbon and wrap it around the firecrackers for a completed look! 

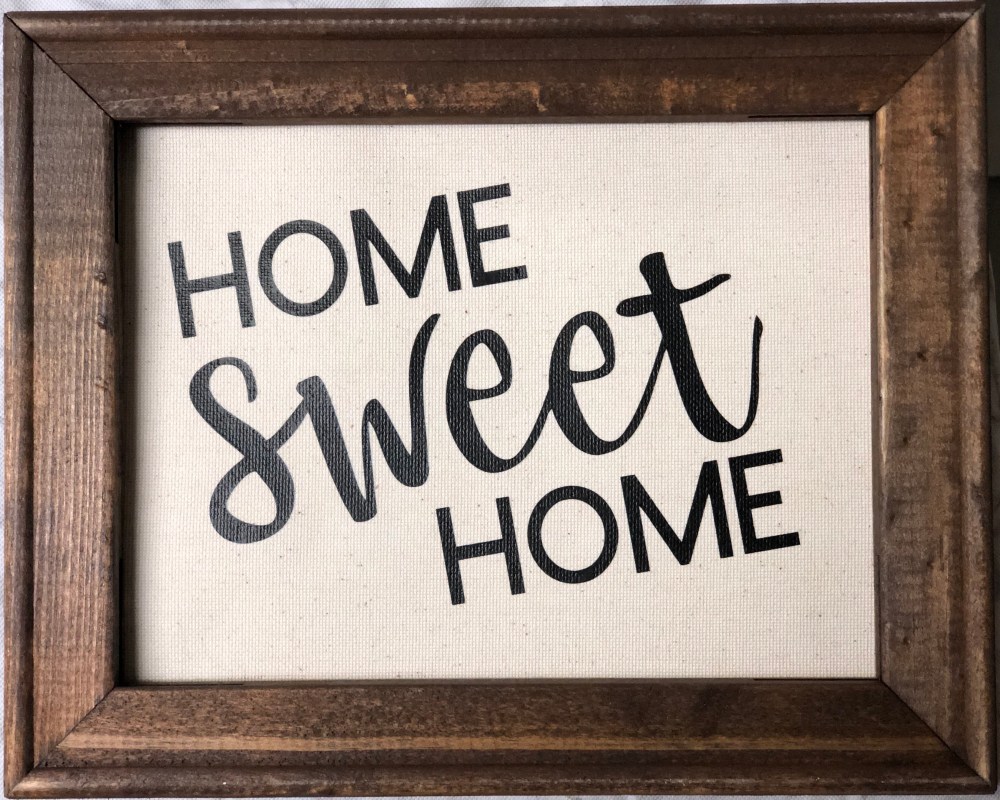
 With the canvas ready, we took our wooden frames into the staining room and stained them. Kelly had three options of stain to pick from – a dark brown, light brown and light grey – I used a mix of the two browns. We then placed the frames on another table to dry and went back to the classroom to begin on the second project; our trays.
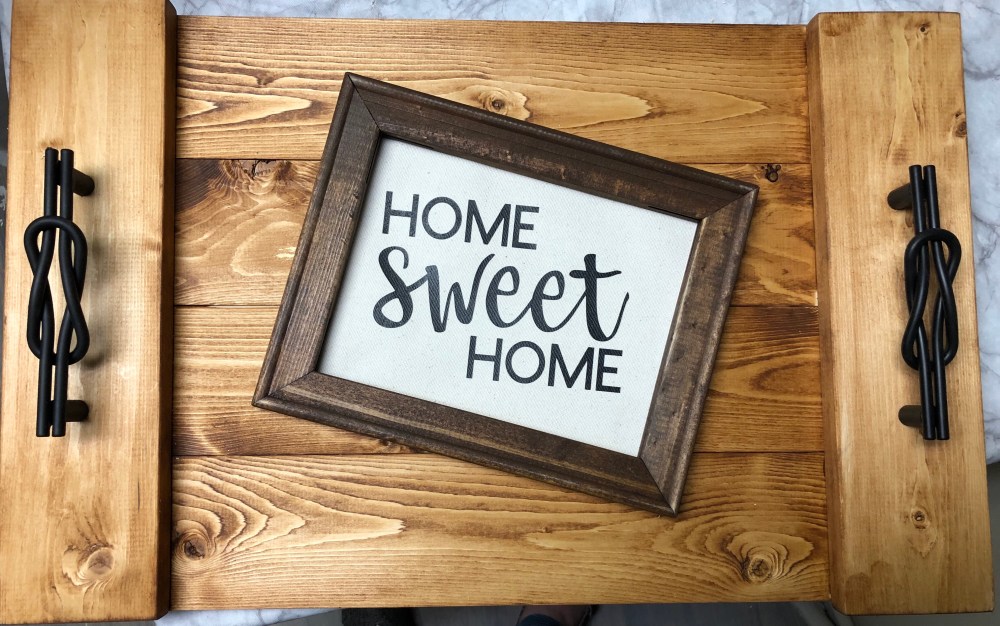
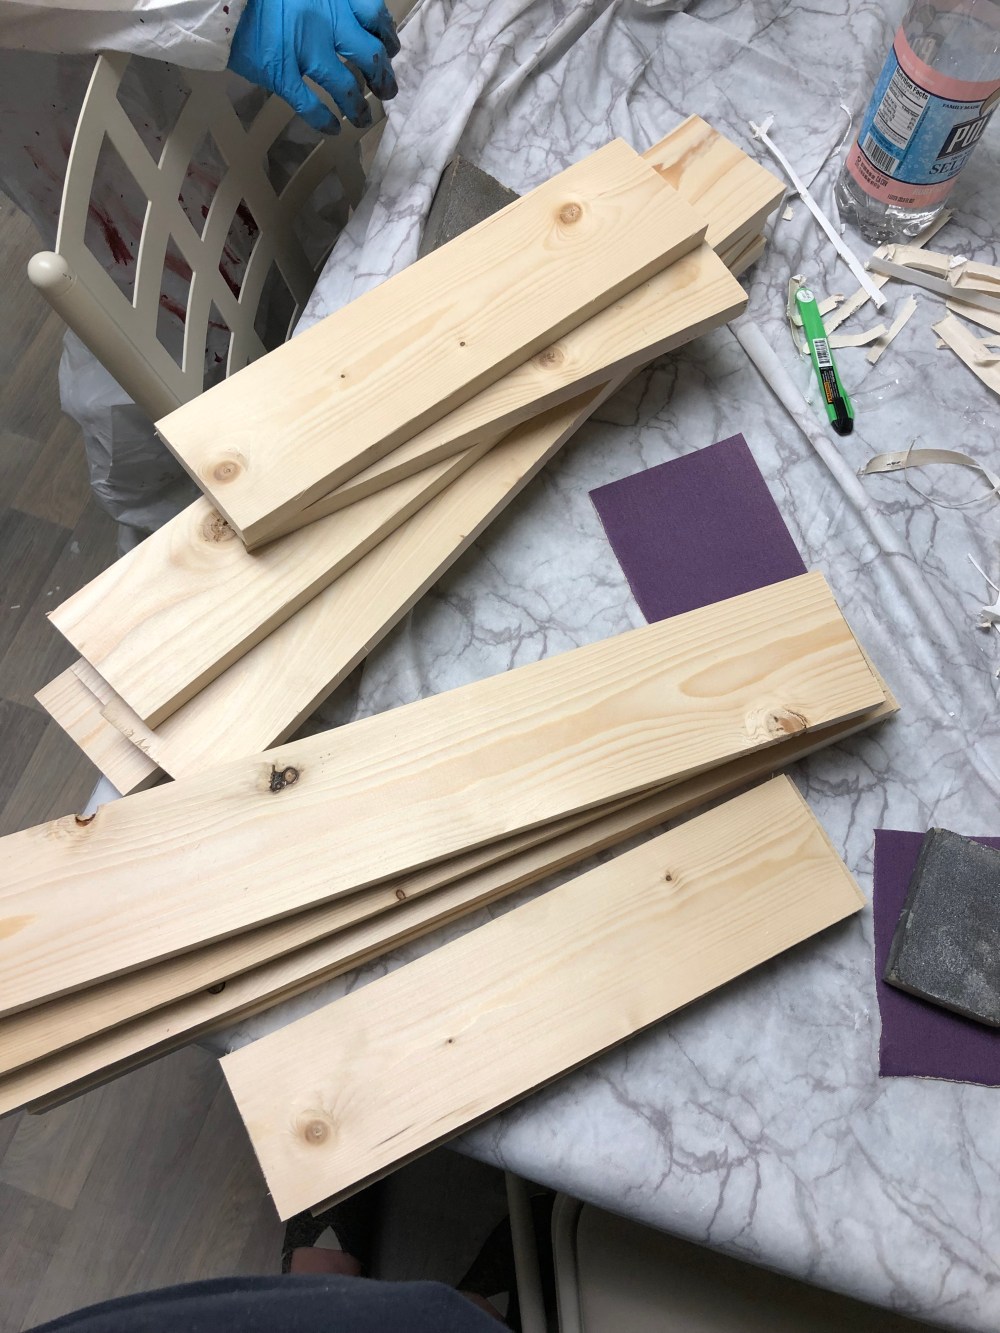 Step one was to sand all of our boards and assemble our trays upside down. The two 14″ boards which would be on the top of the tray with the handles, were set down on the table at the end of the 21″ boards perpendicular to them, laying on top. Once the trays were set up, we used a power drill to screw the long boards to the short boards from the bottom (so you don’t see them when you have the tray out and in use). We then flipped the trays right side up and measured out where we would be installing the handles, marking the spots for the handles to be attached with a permanent marker.
 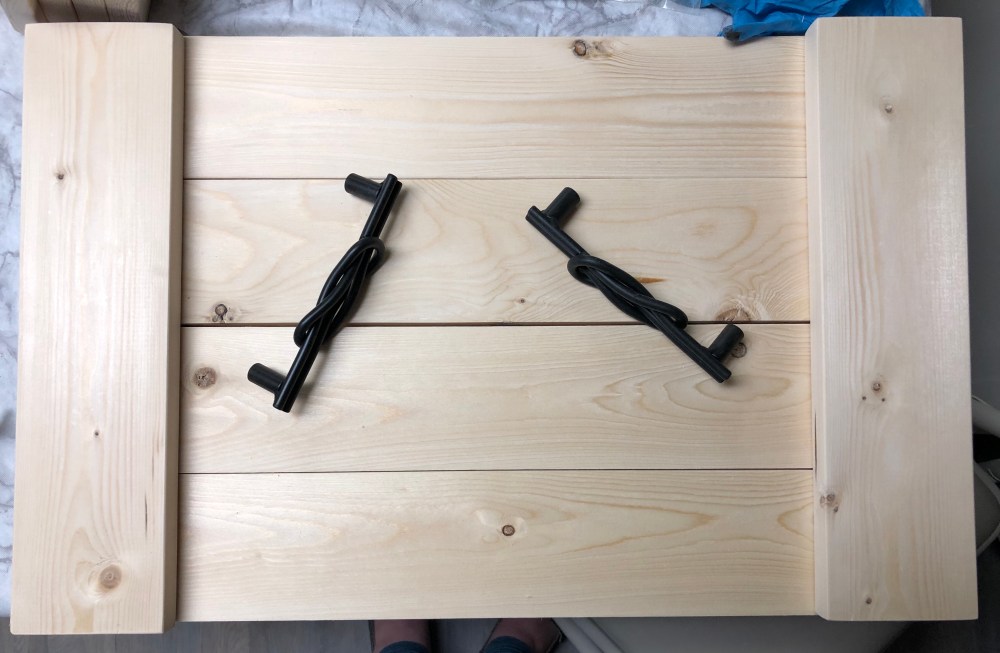 Then we headed back into the staining room to stain the tray. Last year I made a grey one, so this year I made a light brown one – the trays were then put on Kelly’s drying rack to dry.
 To finish the frame, we laid the frame down upside-down, and put the canvas upside-down on top of it, so the blank side of the canvas was facing us. Then we took a staple gun to attach the canvas to the back of the frame, and viola, we had our finished product!